Tuesday, November 29, 2011

Just for Fun/Upgrade Me

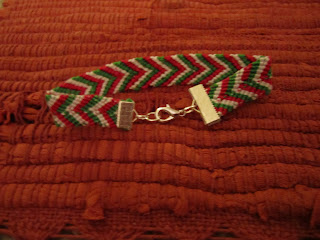
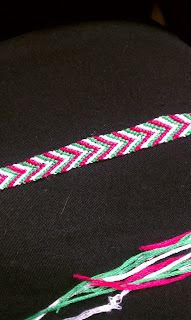
Just for fun I did a Lily Pulitzer colored chevron bracelet! It looks more red in this picture, but I promise-- pink, green, and white!


So I decided to go back to what I'd originally wanted to do and add a clasp on! 

Ribbon clamps in multiple sizes

I didn't have any glue, so I improvised with tape!

Snipped off the end just past the tape

found the right size clamp

and, well, clamped it!

This side was a little bit bigger... not something I'd anticipated!

but the next size up was too big...

I ended up squeezing that end in to the slightly smaller one and clamping it nice and tight.

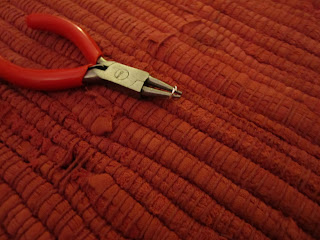
So now I have my bracelet with clamps, jump rings, a lobster clasp, and a small pair of pliers to finish the job!

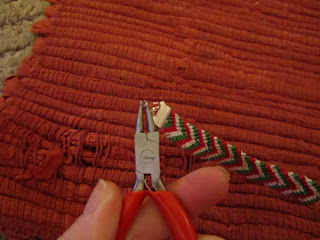
Since my pliers were small, I put them inside the ring and gently opened it up

Because the bracelet was long enough to go around my wrist, I only put a couple of jump rings on

Then I used one jump ring to put the lobster clasp on and...

Voila! Removable friendship bracelet!


Sunday, November 27, 2011

Pretty in Pink

I love seeing all the vintage style jewelry floating around Pinterest, and when I saw this Swarovski elements piece at Michael's a couple of weeks ago I knew I had to do something with it!


So I decided to do a necklace! Now, when I took a closer look at it last night, I noticed something strange-- there are three holes on one side and one hole on the other. Decisions, decisions... should I just use one strand to hook up? Should I do something to dangle down? Then it hit me-- the pink pearls! I love the faux pearls at Michael's because they come in so many different shades and they LOOK fantastic! I don't honestly know where the idea came from to do a three to one pearl necklace, but the pink pearls looked absolutely stunning with this piece, and all I could see in my head was three strands of pearls going in to the pendant, slightly off center, with one strand leading out.. So, without further ado, I give you the three to one necklace!

Three strand necklace clasps, pearls, Dandyline, needle, and pendant-- I figured out later that the lobster clasp would be the best way to go for the one strand side. 

Again, I like using the needle to thread the pearls on-- just makes it so much easier!

When I got to the end (about 39 pearls on this strand), I wound the thread through the loop several times without tying it, that way I could give it a good tug and get the strand nice and tight against the pendant before tying it off. 

Then, I just tied the knot a few times around the loop and gave it a few good tugs with no bad results!

Three side is done! I used 39 pearls for the top strand, 42 for the second, and 44 for the third.

OK, so I just liked this picture and wanted to put it up. Keep reading!

As previously mentioned, I'm not great at forethought, and it was at this point I decided to use the lobster clasp to finish out this end rather than have two empty hoops hanging out. 

I wanted to do the one strand shorter than the three side so the pendant was off center, so I put about 30 pearls on and then looped the thread through without tying it off so that I could test it-- it looked just like I wanted so I tied it off and finished the project!

Now the only question is... do I keep it or sell it?!

Friday, November 25, 2011

A Rose Ever Blooming

Little Things Bring Smiles had a great tutorial on felt flowers that I've become obsessed with! I won't re-do the whole long boring thing for you here, but here are the highlights and modifications from the Meg point of vew!

I'm hoping to do a whole garland of roses, so I pre-cut a LOT of things while watching a movie one night...

Instead of hot gluing while I go, I just roll the whole thing up and make sure I like how it looks

(which I do)

I then insert a needle with knotted thread in to the very center, and aim for one side

Pull the needle and thread through, then make a quick loop back towards the center

Then come back out the middle and do it all over again to another side of the rose

Then, when you're comfortable with the number of stitches (I've been doing four and it works out well), just come back to the center and make a little knot in the middle!

I've always had a bit of bad luck with hot glue, but a needle and thread are my best friend! Since these will have something on the backs, the knots won't be visible or matter, and the same will hold true if you're doing hair pins like Little Things Bring Smiles showed you how to do. Of course, hot glue will probably be best if you're attaching it to something like a headband, but the sewing trick works great and I think is just as quick and easier to do if you're not going to be in one place for a while. I do my crafting at home, on the road, and in the office when I have spare time (during pickup I can't start any work projects, but I can usually get a flower sewn up pretty quickly) and a hot glue gun isn't exactly portable! 

I promise I'll share the garland when it's finished, but since I have until spring (it's for a friend's wedding) it may be a few weeks!


Thursday, November 24, 2011

How To-- Greens

For Karen, over at The Art of Doing Stuff (possibly my favoritest blog evar next to The Bloggess), a picture tutorial to cooking greens for when my seeds make it through customs!

You will need:
*10q stock pot
*3lb greens (aka, "a mess")
*Siracha sauce to taste
*Salt to taste
*Ham hocks, turkey necks, etc.-- whatever's handy!

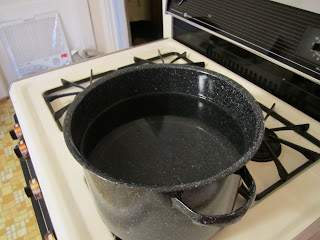
I only had a 7.5q stock pot, but I filled it about 3/4 the way full-- you can do 3/4 full on your 10q

Check your greens to make sure they're not looking wilted or icky (technical term)

If you end up using something like, oh, jowl bacon just slice it up in to strips and cut that down in to chunks

(these chunks are a lot more appetizing than you thought they'd be, right?)

When the water has reached a rolling boil, put the first pound in-- pat it down and throw in your chopped up bacon or turkey neck or what have you. If you have a larger pot, you should be able to slowly add in the entire 3lb of greens. Since I had a smaller pot, I put the lid on and let them boil down for about five minutes, then added the rest in. 

By the last pound, the pot was getting pretty full, so I started siphoning off some of the extra stock; if you have to do this, you'll want to reserve some of it to freeze any leftovers!

Now for my favorite part-- Siracha!! If you like it spicy, put a good helping on top and mix it in.

Throw in a couple palm fulls of salt (yeah, again, technical) to get everything nice and tender

If you're anything like me, you'll add a little more Siracha before putting the lid on and then let it cook for about another 20 minutes on medium. The great thing about greens is that you can let them cook to your desired tenderness-- I usually get them to fairly tender with just a hint of crunch, a little like broccoli!

If you have leftovers (which, honestly,  you will with three pounds!) you can take some of that broth you set aside, put it in ziploc bags with your greens and put it in the freezer. To defrost, pop in the microwave or a pot, or just put in the fridge to melt!

Happy Thanksgiving, y'all!


Wednesday, November 23, 2011

Pinspiration Nails

Being sick takes a lot out of me, so I'm excited to get back to some little projects here and there that I love so much! This week, I went with some more nails-- I found this pin a while back and I've wanted to try it out, and when I sat down to try it I of course decided to make it snazzy!

I chose the orange and blue because they were nice, vibrant colors but I didn't want too much of one or the other. So, here goes!

A sheet of hole protectors, your polish colors, and since I lost my top coat I just used the base coat twice.

Cut your hole protectors in half


Paint your base color on

I used Caliente Coral from Sephora by OPI

For the look I wanted, I put the stickers on about halfway up my nails

Paint over the entire nail with your contrast color (I used "Teal We Meet Again" from the same Sephora by OPI Collection)

I found it was easier to pull the stickers off immediately after painting-- unlike scotch tape, the paper on the hole protectors got a little soggy and messed up the bottom coat a bit

If you look at the thumb and pointer here, you'll see why it's important to push the stickers down all the way so you get a nice even edge!

These looked great and I got a LOT of compliments on them! The only funny thing was that the blue paint over the orange turned out greenish!! I'll definitely try the original Pinspiration soon, especially since I have some beautiful green shades to try and some time to kill with surgery coming up!