Showing posts with label jewelry. Show all posts

Tuesday, November 29, 2011

Just for Fun/Upgrade Me

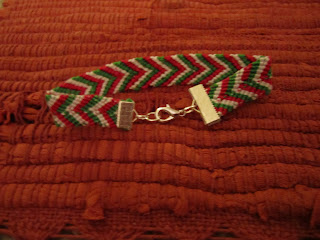
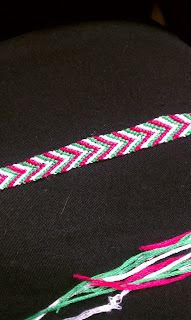
Just for fun I did a Lily Pulitzer colored chevron bracelet! It looks more red in this picture, but I promise-- pink, green, and white!


So I decided to go back to what I'd originally wanted to do and add a clasp on! 

Ribbon clamps in multiple sizes

I didn't have any glue, so I improvised with tape!

Snipped off the end just past the tape

found the right size clamp

and, well, clamped it!

This side was a little bit bigger... not something I'd anticipated!

but the next size up was too big...

I ended up squeezing that end in to the slightly smaller one and clamping it nice and tight.

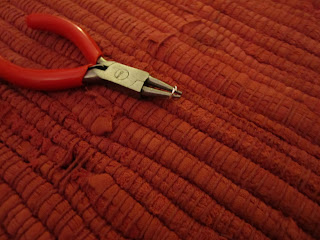
So now I have my bracelet with clamps, jump rings, a lobster clasp, and a small pair of pliers to finish the job!

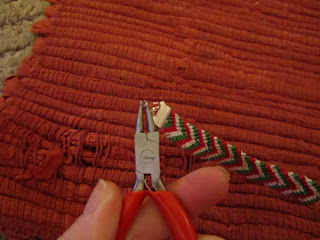
Since my pliers were small, I put them inside the ring and gently opened it up

Because the bracelet was long enough to go around my wrist, I only put a couple of jump rings on

Then I used one jump ring to put the lobster clasp on and...

Voila! Removable friendship bracelet!


Sunday, November 27, 2011

Pretty in Pink

I love seeing all the vintage style jewelry floating around Pinterest, and when I saw this Swarovski elements piece at Michael's a couple of weeks ago I knew I had to do something with it!


So I decided to do a necklace! Now, when I took a closer look at it last night, I noticed something strange-- there are three holes on one side and one hole on the other. Decisions, decisions... should I just use one strand to hook up? Should I do something to dangle down? Then it hit me-- the pink pearls! I love the faux pearls at Michael's because they come in so many different shades and they LOOK fantastic! I don't honestly know where the idea came from to do a three to one pearl necklace, but the pink pearls looked absolutely stunning with this piece, and all I could see in my head was three strands of pearls going in to the pendant, slightly off center, with one strand leading out.. So, without further ado, I give you the three to one necklace!

Three strand necklace clasps, pearls, Dandyline, needle, and pendant-- I figured out later that the lobster clasp would be the best way to go for the one strand side. 

Again, I like using the needle to thread the pearls on-- just makes it so much easier!

When I got to the end (about 39 pearls on this strand), I wound the thread through the loop several times without tying it, that way I could give it a good tug and get the strand nice and tight against the pendant before tying it off. 

Then, I just tied the knot a few times around the loop and gave it a few good tugs with no bad results!

Three side is done! I used 39 pearls for the top strand, 42 for the second, and 44 for the third.

OK, so I just liked this picture and wanted to put it up. Keep reading!

As previously mentioned, I'm not great at forethought, and it was at this point I decided to use the lobster clasp to finish out this end rather than have two empty hoops hanging out. 

I wanted to do the one strand shorter than the three side so the pendant was off center, so I put about 30 pearls on and then looped the thread through without tying it off so that I could test it-- it looked just like I wanted so I tied it off and finished the project!

Now the only question is... do I keep it or sell it?!
Wednesday, November 2, 2011

Pretty Pearls

I volunteer with a chapter of my sorority as an adviser-- I love making little things for my gals when they do a phenomenal job and a set of pearls always does the trick! Of course, pearls are muy out of my budget so I decided to make her a necklace-- way easier than I thought!
DandyLine thread, which was really easy to use and the perfect tension!

Charms to represent some of the symbols this chapter uses
Clasps-- because a necklace that doesn't stay on just isn't worth it

A needle to thread the DandyLine through

Crystazzi Pearls, on sale but cheap anyway-- over 150 of these guys in a pack!

I strung the pearls on using the needle and thread, about 30 to start with

Then I separated the charms with one pearl apiece, then strung another 30 on the other side

I finished the other end at the clasp point and here's the finished product! I have to admit I lost my ruler, so I don't know how long the necklace is, but it rests just below my clavicle and is very comfortable! I can't wait to try my hand at some more jewelry. 

Tuesday, October 18, 2011

Improvement!

OK, so I wrapped up that bracelet from the other day and wanted to give you an update-- I basically went in and re-started the whole thing. 

The knot in the middle there? That's where I decided to forget about it and start all over. Towards the end of the second orange/blue round there's a hole-- that's what happens when you don't knot the strands together in the middle. 

One of the problems I had was that the strings were too loose, so after I did a little more, I taped the second section and it turned out MUCH better, much more consistent!

This is the finished product-- still looks a little like macrame, but overall much better!

Now, I did keep having this issue where the strands didn't come out the same order they went in-- this probably had to do with too much flex in the line, but I liked it so much...
I started forcing the strands out to different places to get a new pattern!


Materials Used: Embroidery Floss
Cost: Very inexpensive!
Time: Pretty time consuming-- it got a little better after I got used to it, but it also helped that I wasn't concerned about the colors staying in a particular pattern.
Conclusion? I'd definitely try this again, but I think it would be helpful to have MORE strands available-- I think that's why it looks more like macrame than the original pinned piece. I'll give it a go and let y'all know!

Thursday, October 13, 2011

Failure is an Option

I had a post for yesterday, but it was a present I made and I haven't gifted it yet so on to other things...

I'm posting this up a) because I failed to post something yesterday, therefore crushing my hopes of an every-other-day update and b) because I'm failing MISERABLY at this friendship bracelet thing!!

I saw this pin for a Friendship Bracelet tutorial and since I never learned how to do the chevron style as a kid, I figured now's as good a time as any! Whirly Bird, the blog with the actual craft, linked me over to HonestlyWTF for a tutorial on how to make this oh-so-fashionable bracelet. Now, I'd already failed at an eight strand braid, but surely this would be easier? No doubt mine would come out smooth and sassy like this one, right?


WRONG!

This is currently the state of my chevron friendship bracelet trial run...


Normally, I would give up and throw the rest of this god-awful embroidery floss in the trash-- really, you have no idea the headaches it's given me! I started out wanting to use that orange with grey for a nice, chic look but the grey would NOT come untangled and I've had almost the same problem with the yellow and blue here!

But, I am going to follow my favorite advice, I am going to Keep Calm and Carry On. Updates to come, no doubt, and hopefully I'll perfect the pattern on these fall colors before my special surprise...